As an Amazon and Walmart Associate I earn from qualifying purchases.
TL;DR:
Non-invasive home EEG sensors detect microvolt electrical fluctuations across five frequency bands: Delta, Theta, Alpha, Beta, and Gamma.
Neural tracking methods include consumer EEG headbands, multi-channel headsets, DIY Arduino boards, and hybrid neurofeedback systems.
Reliable readings require alcohol-based skin preparation, signal noise reduction, conductive gel, 5-minute baselines, and 4- to 8-week tracking protocols.

Measure brain waves at home by using non-invasive electroencephalography (EEG) sensors attached to your scalp or forehead.
These consumer devices detect microvolt electrical fluctuations produced by firing cortical neurons, transmitting real-time spectral frequency data to your smartphone or tablet for instant analysis.
You can measure brain waves at home across five distinct frequency bands:
- Delta (0.5–4 Hz): Dominates during deep, restorative slow-wave sleep.
- Theta (4–8 Hz): Appears during light rest, deep meditation, and REM sleep.
- Alpha (8–12 Hz): Signifies relaxed alertness, calm focus, and stress reduction.
- Beta (12–30 Hz): Drives active concentration, problem-solving, and logical thinking.
- Gamma (30–100 Hz): Fires during high-level cognitive processing and peak mental effort.
These five wave types directly shape sleep quality, focus, relaxation, stress management, and peak performance. Tracking these electrical patterns at home grants clear awareness of your daily mental states.
Various non-invasive methods enable home neural tracking. Having tested these methods at home over several months, each offered unique insights that sharpened my focus and sleep awareness.
To learn how these methods assist in reading brain signals, read the guide below and visit homesdevice.com for details.
4 Proven Methods to Measure Brain Waves at Home
Method 1: Consumer EEG Headbands
Method Steps
- Step 1: Placement & Fit: Place the EEG headband firmly across your forehead. Adjust the strap until the sensors fit flat against clean skin without sliding.
- Step 2: App Connection: Open the companion app on your phone or tablet. Pair the headband via Bluetooth until the app confirms full connection status.
- Step 3: Signal Quality Check: Monitor the app’s signal quality indicator. Green bars confirm proper skin contact; yellow or red indicators require soft sensor repositioning.
- Step 4: Session Execution: Start a guided meditation or focus protocol. Remain still while the headband logs real-time band-power data.
Pairing a wearable sensor or a cardiovascular biofeedback device alongside your headband provides broader physiological context during sessions.
- Step 5: Data Review: After the session, open the analytics report to review the Alpha, Beta, and Theta ratios recorded during your session.
Method 2: Multi-Channel EEG Headsets
Method Steps
- Step 1: Sensor Preparation: Dampen dry electrode pads with a small amount of 0.9% saline solution to minimize skin contact impedance below 10 kΩ.
- Step 2: Scalp Positioning: Carefully position the headset across the scalp, aligning sensors with standard 10–20 system locations for consistent channel mapping.
- Step 3: Impedance Mapping: Check software impedance values for all channels. Low values confirm strong contact, while high values require immediate sensor adjustments.
- Step 4: Data Acquisition: Initiate multi-channel recording in the software suite to capture simultaneous cortical activity across frontal, temporal, and occipital regions.
- Step 5: Export & Analysis: Save recorded files in EDF or CSV formats for detailed waveform analysis in EEGLAB or Python scripts. Access our technical hub for additional setup advice and workflow guides.
Method 3: DIY Arduino Systems
Method Steps
- Step 1: Hardware Assembly: Solder the biosensor board and connect the signal amplifier module to your Arduino or OpenBCI Cyton board following manual schematics.
- Step 2: Electrode Application: Apply gold cup electrodes to scalp sites using conductive paste. Secure a reference electrode behind one ear and a ground electrode on the forehead.
- Step 3: Software Configuration: Open the OpenBCI GUI or custom serial terminal. Configure the sampling rate (250 Hz), gain multipliers, and active channels before recording.
- Step 4: Signal Filtering: Apply digital bandpass filters (0.5–50 Hz) and notch filters (50/60 Hz) to attenuate powerline hum and environmental electrical noise.
- Step 5: Custom Program Execution: Run Python or Processing scripts to view live spectral displays. Log raw data for offline Fast Fourier Transform (FFT) analysis.
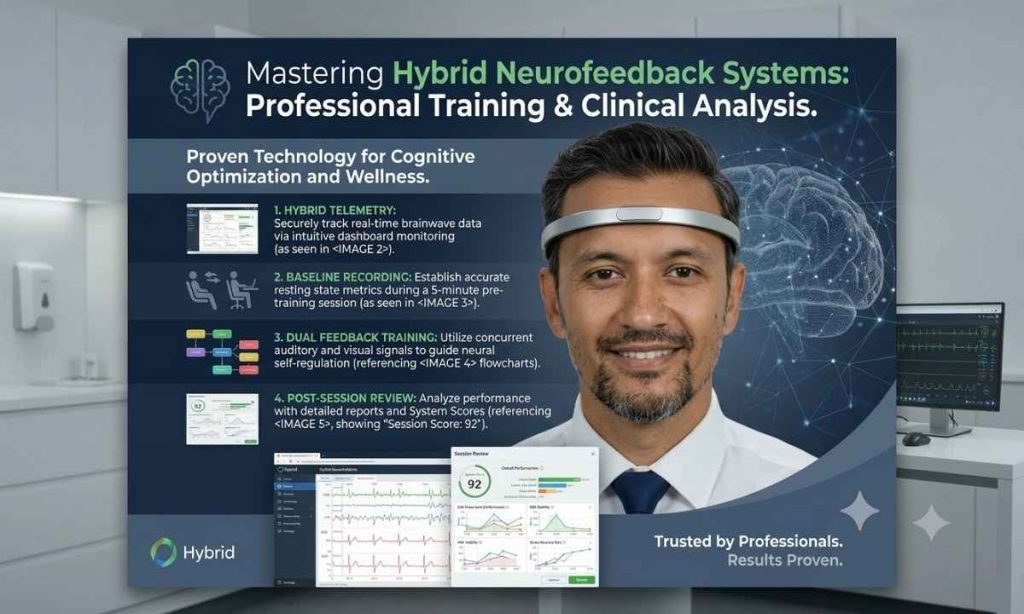
Method 4: Hybrid Neurofeedback Systems
Method Steps
- Step 1: Multi-Sensor Placement: Attach EEG forehead sensors alongside heart rate variability (HRV) or pulse sensors on the wrist or earlobe securely.
- Step 2: Dashboard Syncing: Open the hybrid software dashboard on a tablet or laptop to synchronize multi-sensor telemetry onto a unified tracking screen.
- Step 3: Multi-Metric Baseline: Log a 5-minute resting baseline quietly to record combined brainwave frequencies, heart rate variability, and stress response markers.
- Step 4: Dual-Feedback Training: Start guided training combining audio-visual cues. The system adjusts feedback in real time based on simultaneous brain and body metrics.
- Step 5: System Score Review: Review your combined post-session score and analyze separate trend graphs for EEG power bands, HRV stability, and recovery rates.
Brain Wave Sensor Placement at Home
The 10–20 system maps standardized scalp locations for consistent bioelectric signal recording.
Placements for Home Use
- Fp1 & Fp2 (Forehead): Tracks attention, concentration, executive function, and emotional regulation within the frontal lobe.
- T3 & T4 (Temples): Records language processing, verbal memory, and auditory function above both ears.
- O1 & O2 (Back of Head): Monitors visual processing and eyes-closed alpha relaxation rhythms over the occipital cortex.
- Cz (Crown): Captures sensorimotor rhythm (SMR) at the top of the scalp to train calm mental alertness.
How Placement Differs: Headbands vs. Multi-Sensor Headsets
| Feature | Headbands (Fixed Positions) | Multi-Sensor Headsets (Adjustable) |
| Sensor Count | 1 to 4 fixed channels | Multiple channels across the scalp |
| Placement Flexibility | Fixed forehead/temple locations | Fully adjustable electrode positioning |
| Coverage Area | Forehead and temporal zones | Frontal, temporal, parietal, occipital |
| User Effort | Minimal setup with quick wear | Careful positioning & saline prep required |
Common Placement Mistakes That Ruin Data
- Hair Interference: Dense hair under dry contacts blocks electrical flow and raises impedance.
- Loose Contact: Loose sensor pads introduce motion artifacts and random voltage spikes.
- Incorrect Reference: A mislocated reference electrode skews baseline voltage calculations across all channels.
7 Tips to Get Clean, Reliable Brain Wave Data at Home
Skin Prep Matters
Dead skin cells and facial oils create high electrical resistance. Cleansing the forehead with alcohol prep pads ensures stable conductivity and consistent readings.
Kill the Noise
Electromagnetic interference from nearby chargers and routers corrupts microvolt EEG signals. Maintain a quiet recording space away from active electronics.
Stay Still
Jaw clenching and facial movements produce heavy muscle (EMG) artifacts that overwhelm natural beta and gamma neural signals.
Consistent Session Timing
Brainwave patterns fluctuate naturally throughout the day. Recording at consistent times establishes an accurate long-term baseline. Pairing your routine with a vascular monitor that provides supplementary physiological data alongside neural trends.
Use Conductive Gel
Applying conductive paste or saline solution to dry electrodes lowers skin resistance, ensuring uninterrupted signal flow during slight movement.
Baseline First, Train Second
Capture a 5-minute eyes-closed resting baseline before training. Neurofeedback software relies on baseline comparisons to adjust real-time reward thresholds properly. Utilizing a statistics gauge during prep offers a thorough snapshot of resting vitals.
Track Over Weeks, Not Minutes
Neural adaptation requires persistent training. Evaluate trends across 4 to 8 weeks rather than judging progress by daily sessions.
Recommended Neurofeedback Devices for Home Use
| Your Goal | Recommended Device Category | Benchmark Devices | Why It Fits |
| Meditation & Mindfulness | Single-channel EEG headband | RESTCLOUD Stretcher, Comfytemp Stimulator | Real-time guided feedback, beginner-friendly setup, and accessible app interface for daily relaxation routines |
| Focus & Cognitive Training | 4-channel dry electrode headband | AUVON Stimulator, Zacurate Oximeter | Multi-sensor frontal tracking with companion software access for developer and cognitive monitoring protocols |
| Sleep Optimization | Sleep-specific wearable EEG | KardiaMobile Monitor, LiBa Massager, TENS 7000 | Overnight ergonomic fit, automated sleep stage scoring, and soothing audio protocols for restful sleep recovery |
| DIY / Hacker / Research | Open-source multi-channel board | CoreCoach Biofeedback, Electronic Stimulator | Unfiltered raw data export, full Python/MATLAB software integration, and open community hardware support |
| Professional-Grade Home | Clinical-lite multi-channel system | Sparthos Belt, Upright GO | Multi-channel coverage, research-validated accuracy, and cloud analytics dashboards for long-term health tracking |
How to Start Your First Home Brain Wave Session
Step 1: Choose Your Device
Choose a home EEG headband or multi-channel headset aligned with your budget, technical skills, and primary goals like meditation, focus training, or sleep optimization.
Step 2: Download the Companion App
Install your device’s companion application on a smartphone or desktop, ensuring software compatibility with platforms like Muse App, EmotivPRO, BrainBit, or OpenBCI GUI.
Step 3: Prepare Your Environment
Select a quiet, dimly lit space away from Wi-Fi routers, chargers, and loud noises to prevent electrical interference and physical distractions during your session.
Step 4: Fit the Device
Position sensors against clean forehead skin or scalp, adjusting headstraps carefully until app impedance indicators turn green, confirming stable electrical contact for recording.
Step 5: Run a 5-Minute Baseline
Sit quietly for three minutes with eyes open, then two minutes with eyes closed, allowing the software to record a resting baseline for comparison.
Step 6: Start a Guided Neurofeedback Session
Launch your preferred focus or relaxation training module within the app, following real-time audio or visual feedback cues triggered by your live brainwaves.
Step 7: Review Your Session Data
Examine your post-session analytics report to inspect Alpha, Beta, and Theta power band graphs, comparing current frequency distribution against your established resting baseline.
Step 8: Commit to a 4-Week Protocol
Execute 15- to 20-minute neurofeedback sessions 3 to 5 times weekly for four full weeks to track cumulative cognitive shifts and measurable trend improvements.
Conclusion
Learning how to measure brain waves at home provides clear visibility into sleep efficiency, focus control, and stress recovery.
By utilizing standardized sensor placements, eliminating environmental noise, and maintaining consistent 4-week training protocols, you can measure neural patterns accurately.
What is the most accurate home EEG device for beginners?
Single- and multi-channel consumer EEG headbands provide high accuracy for beginners. They pair seamlessly via mobile apps, feature automated signal quality checks, and require no technical wiring setup.
Can you really measure brain waves at home without a doctor?
Yes. Consumer EEG devices read bioelectric brain waves at home safely. Modern non-invasive headbands provide reliable real-time data for sleep, focus, and relaxation tracking without doctor visits.
What is the most accurate home EEG device for beginners?
Single- and multi-channel consumer EEG headbands provide high accuracy for beginners. They pair seamlessly via mobile apps, feature automated signal quality checks, and require no technical wiring setup.
How long does it take to see results from neurofeedback at home?
Most users observe noticeable cognitive shifts after 3 to 4 weeks of consistent training. Completing 3 to 5 weekly sessions helps establish lasting neuroplastic patterns.
Are consumer EEG headbands safe to use every day?
Yes. Non-invasive EEG sensors passively record natural electrical activity from the scalp surface. No current is transmitted into the brain, making daily use safe as directed.
Do home brain wave devices help with anxiety and stress?
Yes. Alpha wave neurofeedback promotes deep relaxation and helps lower physiological stress responses. Real-time feedback assists the brain in shifting away from anxious high-beta patterns.
As an Amazon and Walmart Associate I earn from qualifying purchases.